 |
See how well the fabrics work together. |
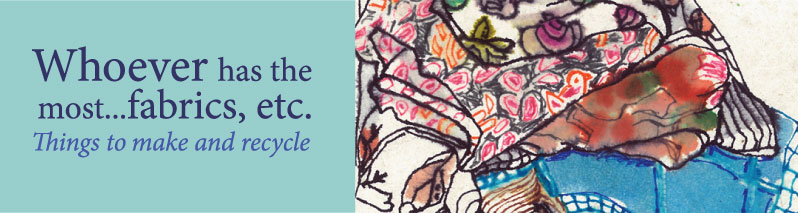
Cockney rhyming slang began in the mid 19th century, in the East End of London and was thought to be used by market traders to talk among themselves in front of customers and also by criminals to confuse the police. It is not much used now, but has a quaint reminiscence of Victorian London. Here, I am using it as a pun for two butchers' aprons.
These two aprons were inspired by Gudrun Sjoden, a Swedish designer, whose shop opened in Seven Dials last year. Her sense of colour and playfulness in fabrics is wonderful, particularly in a climate where there is a predominance of grey. As usual, drawn to the colours and fabrics, I couldn't resist a metre of each of these coordinating fabrics. I thought it would be fun to combine them in two aprons, using one for the base of each apron and the other for the pockets and trims. I could have made fancier, frillier aprons, but I really like the shape of a butcher's apron. It is good and large for protection from spatters and spills, adjustable for many shapes and sizes and unisex.
These aprons could be made in a couple of hours, as the cutting and sewing is relatively simple. Because I had a miserable cold and I was trying to photograph each step, they took me a week, doing a little each day,
What you need:
To make one apron you need:
1 metre of furnishing fabric. (150 cm wide).
1/2 metre of contrasting fabric.
a small piece of iron on interfacing.
a package of bias binding in a coordinating colour.
2 D rings.
Matching thread.
Main part of apron:
If you don't have a pattern, make one by laying an existing apron on paper and tracing around it.
Measure the pockets and make a pattern using the measurements. (My existing apron had a rounded pocket, but I squared it off for easier stitching. Add seam allowances all around (5/8" or 1.5 cm) and an extra 2" (5 cm) at the bib and skirt of the apron for hems.
 |
Tracing my favourite apron. |
 |
I used two large sheets (A2) of paper taped together. |
 |
A view of the whole pattern which will be cut on the fold. |
 |
Apron pocket pattern with measurements written on it. |
Lay out your fabric. Pin your pattern on making sure it is on the straight grain of the fabric, then cut out carefully.
Cut out a piece of iron on interfacing (2" x the width of the top of the bib) and iron it on to the inside of the bib of your apron. (It is essential to be re-enforce the bib because of the pull of the strap that you will attach later.)
 |
View of wrong side with interfacing. |
To hem the curves of the apron, use bias binding. With right sides together, stitch bias binding along the curves of the apron. Press under and stitch along the edge of the binding.
 |
Facing the curves with home-made bias binding. |
Hem the bib of the apron by turning under 1/4" (.5cm) at the top of the bib. Press.
Turn under the sides of the bib in line with the bound edges of the curves and press.
Now turn down the bib hem (the rest of the 2", 5 cm), press and machine stitch along the edge on the wrong side.
 |
Bibs ready to stitch. Side edges are folded and tucked in. (Not shown.) |
Hem the sides of the apron by pressing under 1/4"(.5 cm) and then another 1/2 " (1 cm) and stitching.
 |
Hemming the sides. |
Now hem the skirt of the apron by turning under 1/4" and then 1 3/4" and stitching.
Fold the apron in half length wise and press to mark the centre. This will help with the pocket placement.
Pocket:
Hem the top edge of the pocket b turning under twice (about 1/2" each time).
Press and stitch.
Zig zap the other edges to neaten, then turn under 1/2" and press.
 |
Pockets finished on the inside and ready to stitch on. |
Measure down 12" (30 cm) from the top of the bib, centre the pocket and ensure that both sides are exactly the same distance from the top. Keep measuring while you pin as it can easily go wonky.
 |
Measuring for pocket placement. You can see where the pressed centre makes it easier. |
Stitch into place with two rows of stitching.
Straps:
Cut three lengths of fabric 30" (76cm) long and 4"(10 cm) wide.
Fold in one short edge on each length approx. 1/2" (1 cm) and press.
Press each long edge in 1/2" (1 cm).
Then fold in half lengthwise, press again and stitch along edges.
Zig zag raw end of each strap.
Take one strap to use for the neck and cut off 4 1/2 " (11 cm).
Fold in half, placing D rings inside fold.
Stitch as close to the D rings as you can.
Zig zag the raw edges together.
Finishing:
 |
Neck strap and D rings stitched on with 'boxed X'. |
 |
Ties pinned in place and ready to be stitched with ''boxed X'. |
Place and pin the neckline strap and the D ring strap onto the inside of the bib.
Stitch firmly into place by stitching a square with an X in the middle.
Place and pin the waist ties into place and stitch in the same way.
Press the apron.

 |
Here they are modelled by Matilda. |
I love making aprons and your fabric choices look great :D
ReplyDeleteBeautiful co-ordination of fabrics. I especially like the bottom one.
ReplyDeleteŚwietnie wyszły te fartuszki:)
ReplyDeletePozdrawiam:)))